
Traversal, Koo Scent & Exploration Guide
A field decision path for pheromone trails, barks, jump points, temporary platforms, height, and falling attacks.
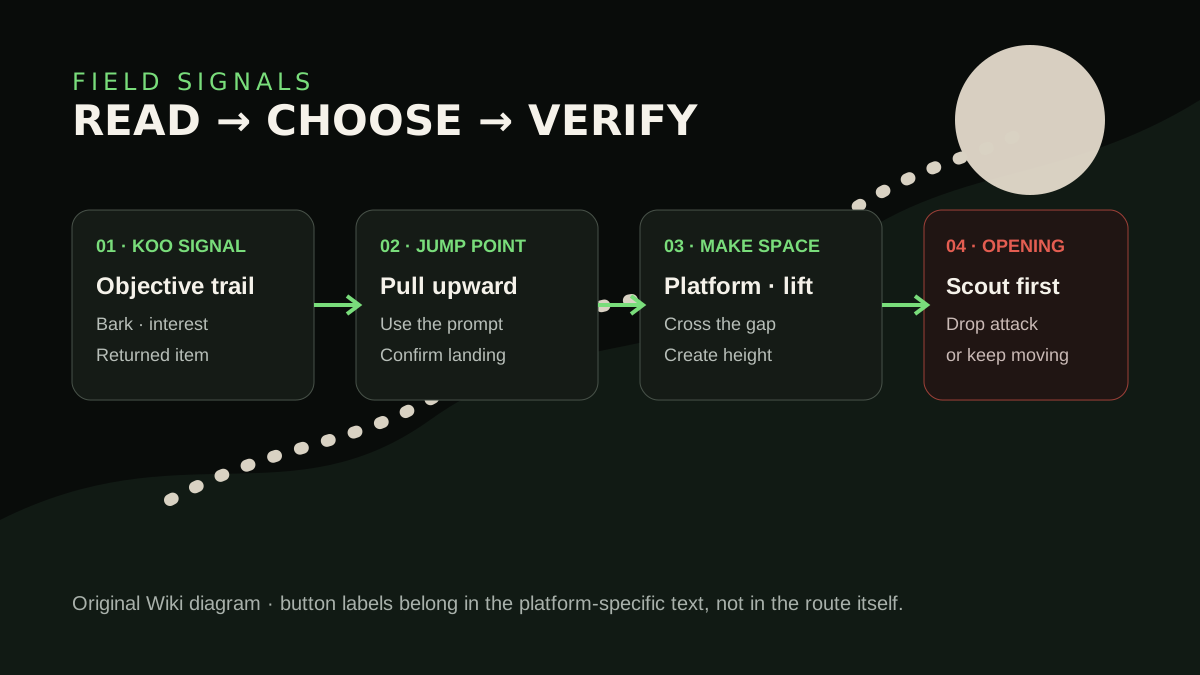
Table of contents
Read Koo’s field signals
Exploration works best when you treat Koo as a second information channel instead of following the objective marker alone. Koo can point toward objectives with a visible pheromone trail, bark when something nearby deserves attention, and return with an item. Those signals answer different questions:
| Signal | First response | What to verify |
|---|---|---|
| Pheromone trail | Face the direction before moving | Is it the current objective route or a path you have already cleared? |
| Bark or interest reaction | Stop and scan above, below, and behind the route | Is there a side opening, object, or vertical path? |
| Returned item | Check what entered the inventory | Does its category point to crafting, cooking, equipment, or completion progress? |
Do not sprint past a bark and then search an entire region. Freeze the scene where the signal happened. Turn the camera in a small circle, check the nearest elevation change, and look for a traversal prompt before widening the search.
Use Emma’s hair actions
Emma’s plant-like hair is both a route tool and a way to create combat height. On the default PlayStation layout, the visible field actions include:
- Tap R2 at a highlighted jump point to pull Emma toward higher terrain.
- Hold R2 to create a temporary hair platform that can bridge usable space.
- Press Cross for the hair action that raises Emma vertically.
- When height creates a valid opening, R1 can convert the drop into a falling assassination.
Use the prompt shown by your current platform and custom layout when it differs. The important sequence is not the button name; it is identify the route → create or take height → confirm the landing → decide whether to move or attack.
Solve a vertical route in four passes
- Read the destination. Identify the ledge, gap, high wall, collapsed route, or enemy position you are trying to reach.
- Find the anchor. Look for the highlighted jump point or the space where a temporary platform can be created.
- Check the landing. Before committing, rotate the camera enough to see whether the destination is safe, hostile, or part of a longer chain.
- Re-scan with Koo. A successful traversal step can put a new scent line, bark, item, or side path within range.
If the prompt never appears, do not assume the input is broken. Change camera angle, move closer to the intended anchor, and confirm that the route is currently accessible. If other controls or prompts are also inconsistent, use Controls & Input Troubleshooting before treating one traversal point as a map defect.
Turn height into a combat choice
Verticality can create distance from a group, an angle for a projectile, or a falling assassination against an unaware target. Scout before you drop:
- Count enemies that can see the landing area.
- Decide whether the goal is an instant opening, isolation, or bypass.
- Keep enough camera space to read the first counterattack after landing.
- If the opening becomes a normal fight, return to the parry-and-command loop instead of forcing another traversal action.
The game also supports stealth approaches and ranged attacks, so an available drop is an option rather than a mandatory solution.
Recheck a blighted route
Blight can change the environment in real time, with plains or wasteland becoming forest and new threats appearing. When a familiar route changes, use stable landmarks before relying on memory:
- the last campsite or shrine;
- a large structure, bridge, wall, or elevation change;
- the direction of Koo’s current pheromone trail;
- the exact point where the environment changed.
This makes the return path reproducible even when the scenery is not static.
Support completion without pretending the map is complete
Completion goals include visiting every shrine and campsite, speaking with 30 Keeper Golems, reading every document, viewing every lore painting, and finding several equipment and recipe families. Use the searchable All 46 Achievements page to separate those families.
For a useful personal route note, record the region, nearest stable landmark, Koo’s signal, traversal action, item or interaction, and whether the path can be revisited. That small record is more useful than an unlabeled pin. A complete coordinate map still requires a full region-by-region observation set.
Continue with Healing, Hunger & Cooking when field ingredients begin feeding the home-base loop, or return to the First Hours Guide for a spoiler-light session checklist.
Related guides
Beast of Reincarnation First Hours Guide
Learn the opening Emma-and-Koo loop, set a safe baseline, and avoid wasting early upgrades.
Read guideCombat, Parry & Koo Commands
Turn a successful Just Guard into Koo command pressure, then reset the fight on your terms.
Read guideHealing, Hunger & Cooking Guide
Keep natural recovery active and connect ingredients, Kagura’s meals, crops, seedlings, eggs, and field preparation.
Read guide